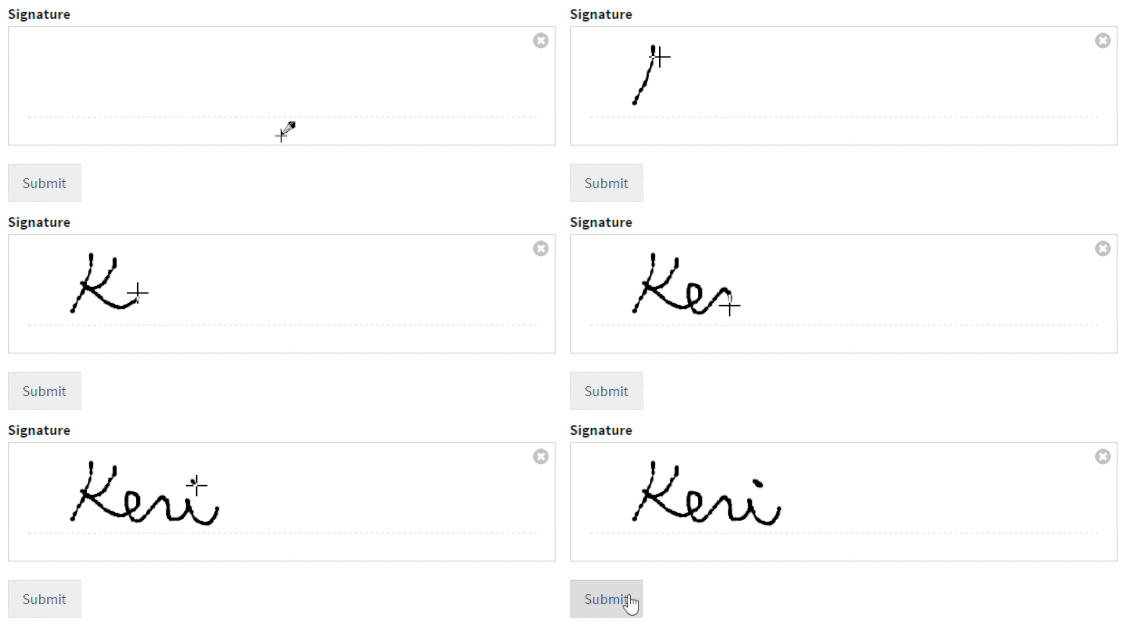
Do you want to create signed service agreement forms in WordPress? With WPForms, you can easily get a WordPress contract agreement signed with a digital signature without having to print, scan, or fax it.
In this article, we’ll show you how to create service agreements in WordPress with digital signatures.
Why Create Signed Service Agreements in WordPress?
Creating signed service agreements in WordPress is a win-win situation for both you and your clients.
Service agreements on your website:
- Make it easy for clients to sign your contract. With WPForms, you can allow your clients to sign service agreements using their mouse or touch screen.
- Are more convenient for you. You don’t have to send emails back and forth to get a document signed.
- Allow you to close deals faster. Since you can close more deals in a shorter period of time, your signed service agreement forms may lead to faster business growth.
Before You Create Your Service Agreement
When it comes to creating a service agreement, many small businesses shy away from using a lawyer. It’s true that you can save on legal fees by doing a quick Google search and writing it up by yourself.
However, when you create a service agreement, you’re making a huge business decision. A lawyer can make sure the agreement is written correctly, so you can avoid legal issues down the line.
A typical service agreement will usually:
- Specify the terms of service and payment
- Ask for client details including physical address and phone number
- Get the digital signature of your client
To get an idea of what a service agreement for your business might look like, you can look at a sample agreement. This sample service agreement for a small cleaning business may not relate directly to your business, but it gives you an idea of what your service agreement should include.
Now, let’s take a look at how to create service agreements in WordPress with WPForms.
Step 1: Create Your Digital Signature Form
Before we create the service agreement page, let’s create a signature form to get started. By collecting a digital signature on your website, you won’t need to send the contract back and forth to your clients to get it signed.
In order to accept digital signatures on your site, the first thing you’ll need to do is install and activate the WPForms plugin. For more details, see this step by step guide on how to install a plugin in WordPress.
You’ll also need to install the Signature Addon so that users can submit digital signatures in WordPress as a part of the agreement. You can learn how to install and use the Signature Addon here.
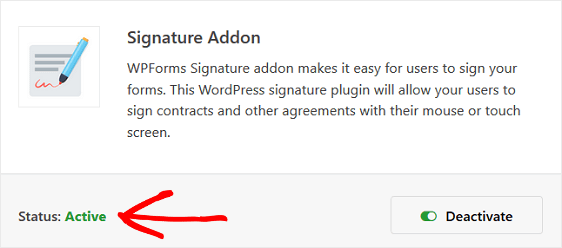
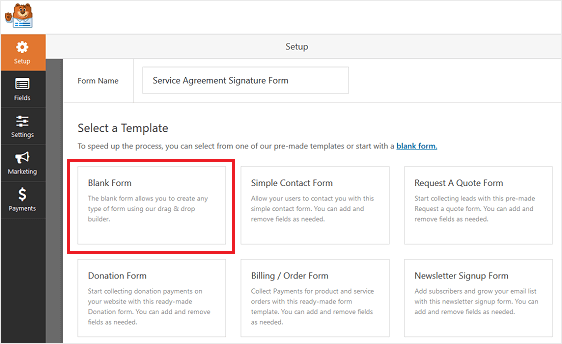
After installing the plugin and the Signature Addon, you’ll need to create a form. You can see our tutorial on creating a simple contact form to get started.
In our example, we’ll use the Blank Form template so we can create a WordPress contract agreement form from scratch.
Once in the Form Editor, you’ll find the Signature form field under the Fancy Fields section.
Click the button to add it to your form, or drag and drop it where you want to place the field.
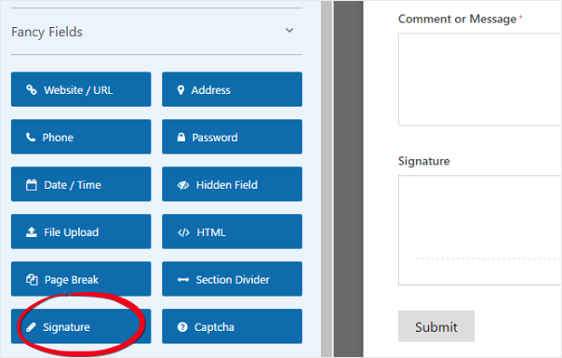
To make changes to the Signature form field, just click on it. Make sure to set the field as Required so that users can’t submit your form unless they add a signature.
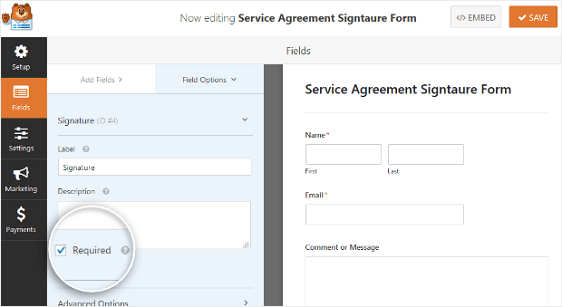
Once done, click on the Save button in the top-right corner.
Step 2: Configure Your Form’s Settings (will include electronic signature settings)
Before you add your form to your Service Agreement page, you should configure its settings.
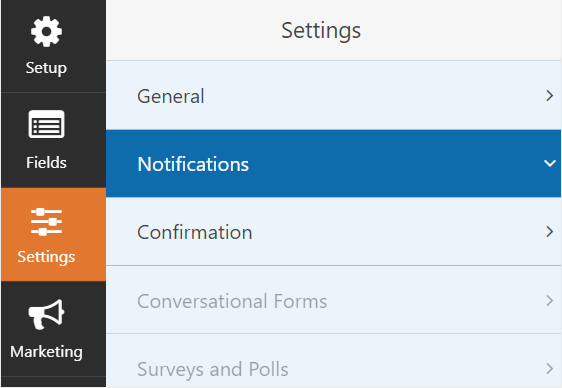
There are many settings you can configure on a WordPress form:
- General Settings: Here you can change things like your form’s name, description, and submit button copy. You can also enable additional spam prevention features to keep your website secure from unwanted form submissions.
- Form Confirmations: Form confirmations are messages that display to site visitors once they submit a service agreement form on your website. WPForms has 3 confirmation types to choose from: Message, Show Page, and Redirect. You can choose 1 or a combination of all 3.
- Form Notifications: Notifications are a great way to send an email whenever a form is submitted on your website. A notification will automatically send an email to you once a form is submitted on your site. You can also automatically send an email to the site visitor that submitted the form and anyone else that needs to be notified of a form submission.
If you’ve added a Subscribe checkbox to your service agreement form, you’ll need to connect it to your preferred email marketing provider.
WPForms offers the following email service provider integrations:
Click the Save button every time you make a change to any of your form’s settings.
Step 3: Create and Publish Your Service Agreement
Let’s add the service agreement form to a WordPress page now.
Go to Pages » Add New to create a new page. Let’s name our WordPress page Service Agreement and add the agreement text.
To add the service agreement form, click on the Add Block (+) icon. Now search for the WPForms block using the search box and click on it.
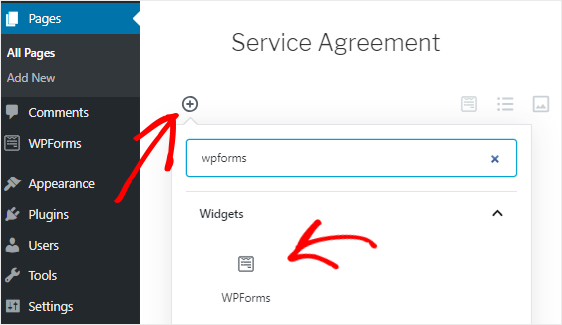
Next, select your service agreement form from the dropdown box to add it to your page.

Then, click on the Publish button so your service agreement appears on your website.
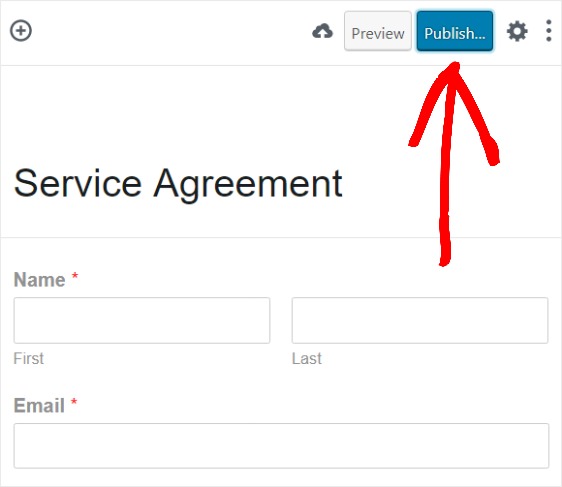
And there you have it! You now know how to create service agreements in WordPress with digital signatures.
Want to save more time with WPForms? Try creating a job application form so that you can quickly gather all the information you need to select the best candidate.
So, what are you waiting for? Get started with the most powerful WordPress forms plugin today.


