
How to set up Stripe for WooCommerce

WordPress for eCommerce
What do I need to have in an eCommerce website?
What is Stripe and why to use it in your eCommerce?
How to Setup Stripe for WooCommerce

After you complete the registration process and confirm your email address, the dashboard or control panel of your Stripe account will look like this below.

When you see this dashboard, it means that your registration was completed successfully.
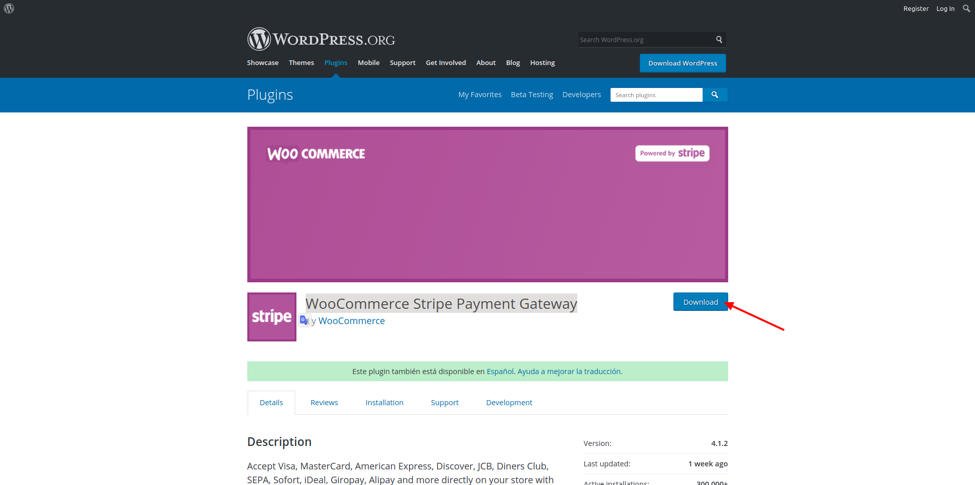
Step 2: Next, download and install WooCommerce Stripe Payment Gateway plugin.
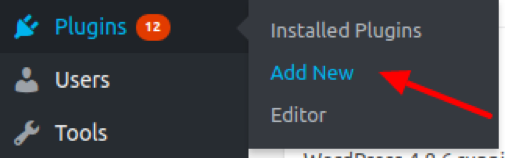
You can also add it directly from your WordPress dashboard by going to Plugins > Add New.
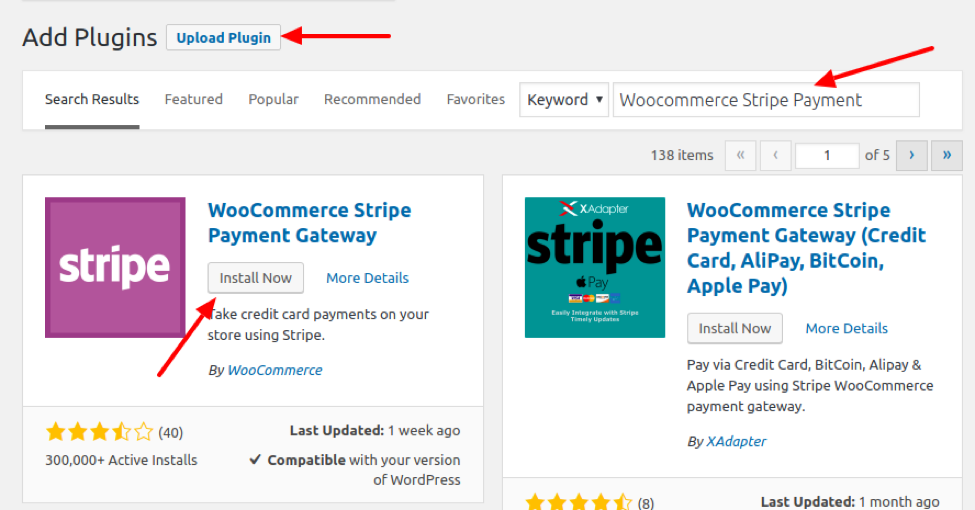
If you add it from your WordPress dashboard, the next step is to search for the plugin. If you choose to download it, then you will want to upload to your WordPress instance using the Installer.
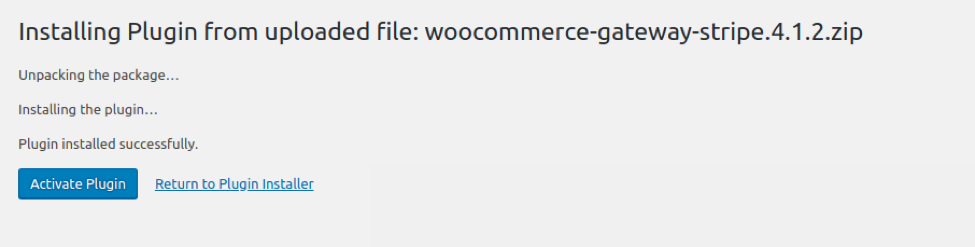
After you successfully install the plugin, you will want to click on Activate Plugin in the next screen that appears.
Step 3: Configuring the plugin.
To activate Stripe as a payment option in your WooCommerce store, you will need to configure the settings first.
To access the Stripe settings, we will need to navigate to WooCommerce> Settings.

From the WooCommerce Settings area, you should select the Checkout tab, and then you should click on the Stripe link in the Checkout options menu.

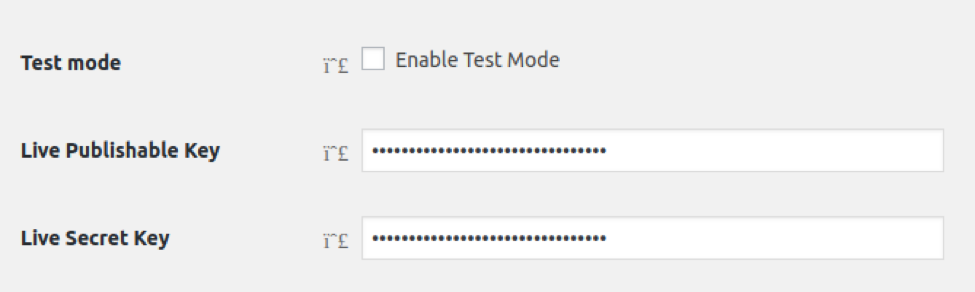
This is what the options will look like below:

Here, you will need to check off the Enable/Disable checkbox. Then, you will need to enter the Publishable Key and Secret Key that will be provided to you in Stripe. There are also text keys available so that you can test your setup. Keep in mind, to activate and use this setup in production you must disable Test Mode by unchecking the Enable test mode checkbox.
How to find your Stripe API Keys?
To get the Publishable Key and Secret Key, you will need to go to your Stripe account. You can also click here to go directly to your API key information. Or, from within the Stripe Dashboard, find and click on Developers and then API Keys.

If you want to test before going live, you should activate the Test Mode and use your Test API Keys instead of the Live API Keys. Either way, these fields will be the same as below.
Next, you should save your changes to ensure nothing is lost.
Step 4. Make sure that the Stripe payment gateway is activated.
To do this, you should return to the Settings tab within WooCommerce. Next, click on the Checkout options link.

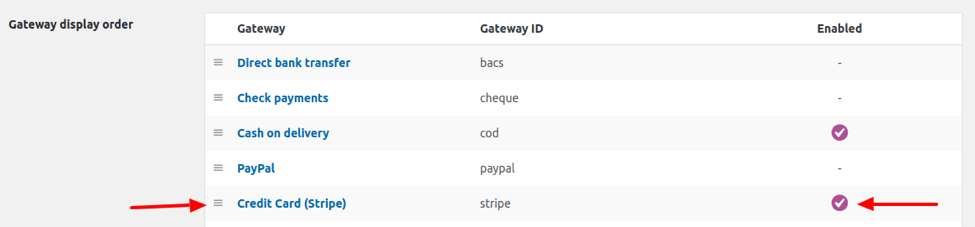
At the bottom of the Checkout options screen, you will need to find the Gateway display order area, where you will find Credit Card (Stripe) listed and should show a white checkbox in a purple circle like below.
Step 5. Check the Credit Card (Stripe) option at the checkout.
We recommend performing an entire purchase and checkout process to ensure that everything is working as it should. This also helps prevent any issues later on.

My areas of focus include marketing strategy development, marketing operations design and optimization, marketing automation, sales operations, content development, content marketing, content monetization, web development, design, and information architecture.
I pride myself on being technical, strategic, and tactical. I work well as the liaison between the technical and non-technical project stakeholders, and I work diligently to achieve results.