


Website Performance Optimization focuses on making sites faster, more reliable, and easier to use across devices. We address performance issues at the structural level rather than relying on surface-level fixes that only improve scores.
Our work improves how pages load, render, and respond for real users. By reducing friction and technical overhead, we help websites support better usability, search visibility, and long-term scalability.
Speed tools provide signals, not solutions. We focus on changes that improve how a site actually behaves for visitors. The result is measurable performance that users can feel.
Performance problems often stem from inefficient layouts, scripts, or delivery paths. We address these issues at the system level. This creates cleaner, more predictable behavior across the site.
Fast sites must remain reliable as traffic increases. We optimize performance with stability in mind. This reduces slowdowns, layout shifts, and unexpected failures.
Performance should improve as sites evolve, not degrade. Our approach supports content growth, new features, and long-term maintenance. Optimization is aligned with how the site will be used over time.
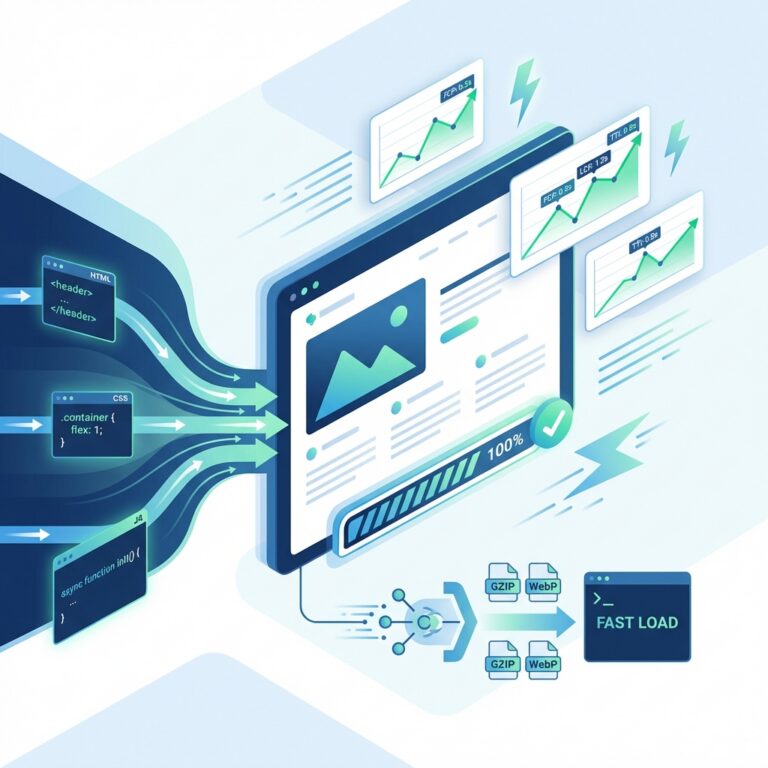
We optimize the metrics that directly affect user experience, including load speed, responsiveness, and layout stability. Improvements focus on addressing real bottlenecks rather than cosmetic fixes. This helps pages feel faster and more stable for visitors. Performance gains are tied to practical outcomes, not just reports.
We streamline how browsers load and render pages by reducing unnecessary scripts and optimizing assets. This improves visible load times and interaction smoothness. Front-end tuning focuses on how users experience each page, not just how it tests. The result is faster rendering and fewer interruptions.
We evaluate hosting environments, server configuration, and caching layers to reduce delays before pages load. Server-level improvements improve reliability and response time. This work ensures infrastructure supports performance goals. It is especially important for sites with growing traffic.
Media files are optimized to load quickly without sacrificing quality. We improve how images and videos are formatted, delivered, and displayed across devices. This reduces page weight and improves load consistency. Optimization supports both performance and visual clarity.
We design caching strategies that match how your site actually functions. This includes page caching, object caching, and content delivery configuration. Proper caching improves repeat visits without breaking dynamic features. The goal is faster delivery with predictable behavior.
We audit site performance to identify inefficiencies, conflicts, and regressions over time. Ongoing optimization ensures performance remains consistent as content and features change. This approach supports long-term stability rather than one-time improvements. Adjustments are deliberate and measured.
Let’s improve how your website performs
Got questions? Ideas? Fill out the form below & our specialist will contact you.